Being Prepared

It was a year ago Saturday that I first wrote a post about being prepared. I felt the need to mention it again and the need to make another post about it as a bit of a public service announcement. My posts about anything other than food or projects don’t tend to get a lot of views, but thank you for reading and for hopefully considering preparations. I grew up as a girl scout, and that taught me a lot of basic survival skills, but more than that, I grew up in a way that has made me want to be prepared for whatever may happen. For that reason, during college I was often the “mom” of the class due to me carrying around just about anything I could need. Hungry? I had snacks. Cut? I had band-aids and a styptic pencil. Pain? I had Ibuprofen and Alieve for Migraines. Just about anything I could need I had, making my bag about 5 pounds heavier, but at least I always had a way to help the situation I was in. It wasn’t always that I would need something, but on the regular when I would need something I always had it.

Advertisements

When I got married, we had many different goals for our life. When two people come together in marriage, it’s good to have common objectives and goals for the future, and that includes talking about what our priorities should be and what goals we should work towards. Of course, it was always a goal to have a garden and this blog, but I had no idea at the time the pandemic was coming. I have experienced hardship in my life while growing up, but there are many from my generation that didn’t experience any hardship. I’ve always been a bit of a hoarder when it came to making sure we had food, but the pandemic just encouraged me to go until I’m satisfied. It sounds like it’s a bad thing, and if I were stocking up when the stores were empty, then maybe I’d feel a bit more self conscious, but I’ve always been overly prepared with non-perishables and canned goods. So what were some of the biggest changes I made?

One big change I made was trying things I had never cooked with before. The pandemic started to become serious 8 months after I got married and moved in with my husband. My biggest changes were beans and rice. Growing up, I never had them, so even though we don’t have to rely on just beans and rice, each ingredient can contribute to a healthy diet without eating like someone who is in poverty. Another huge change was buying ingredients to bake. I had never had anything significant made from scratch at home. If it comes in a box, why go through all the effort? Well, the basic ingredients for baked goods gives you a well rounded kitchen and a blank slate for so many recipes. Further, I had never had food seasoned by anything other than salt or seasoning packets. Spices add so much life to food, and there are so many cultures you can visit though food and spices. Eating just to eat doesn’t make it an enjoyable occasion, that’s why spice is so important. Try food that is new with spices you may or may not like, even just to say you tried it!

Advertisements

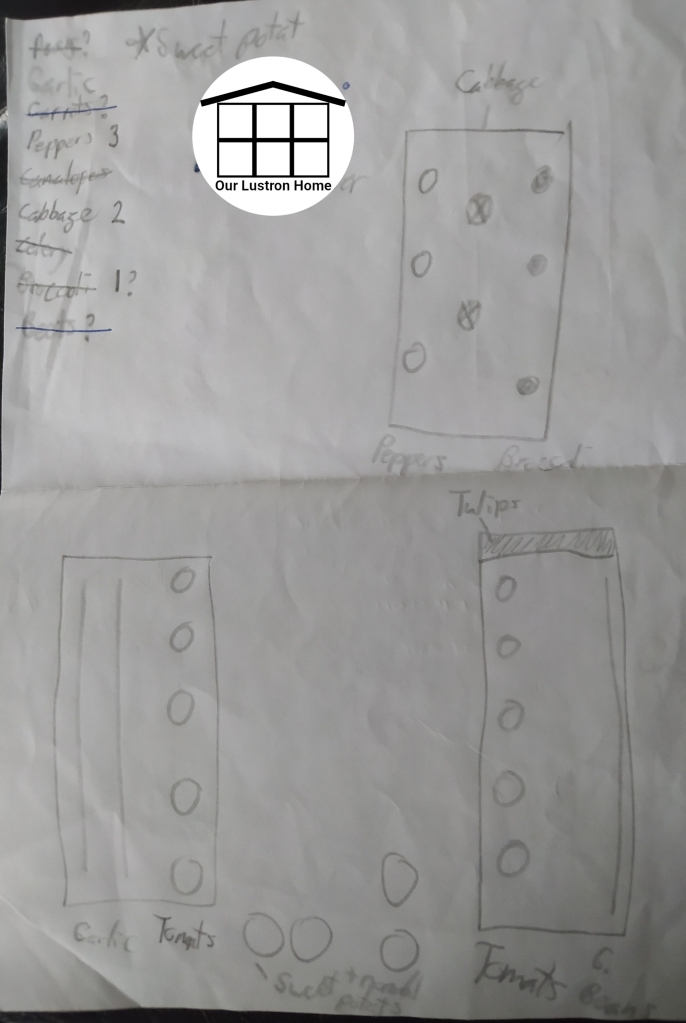
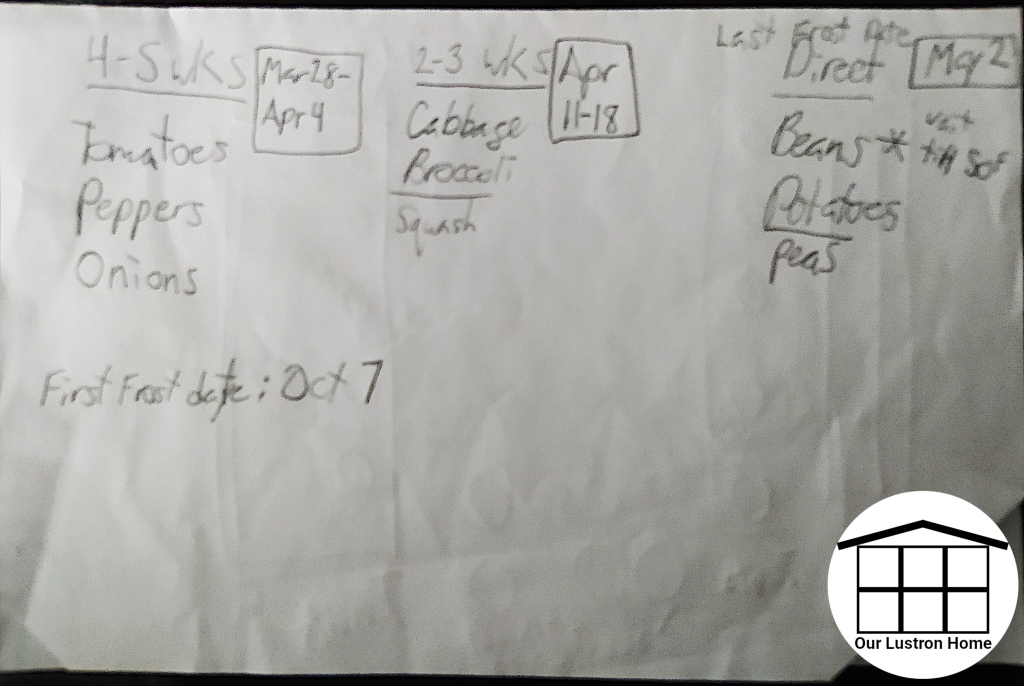
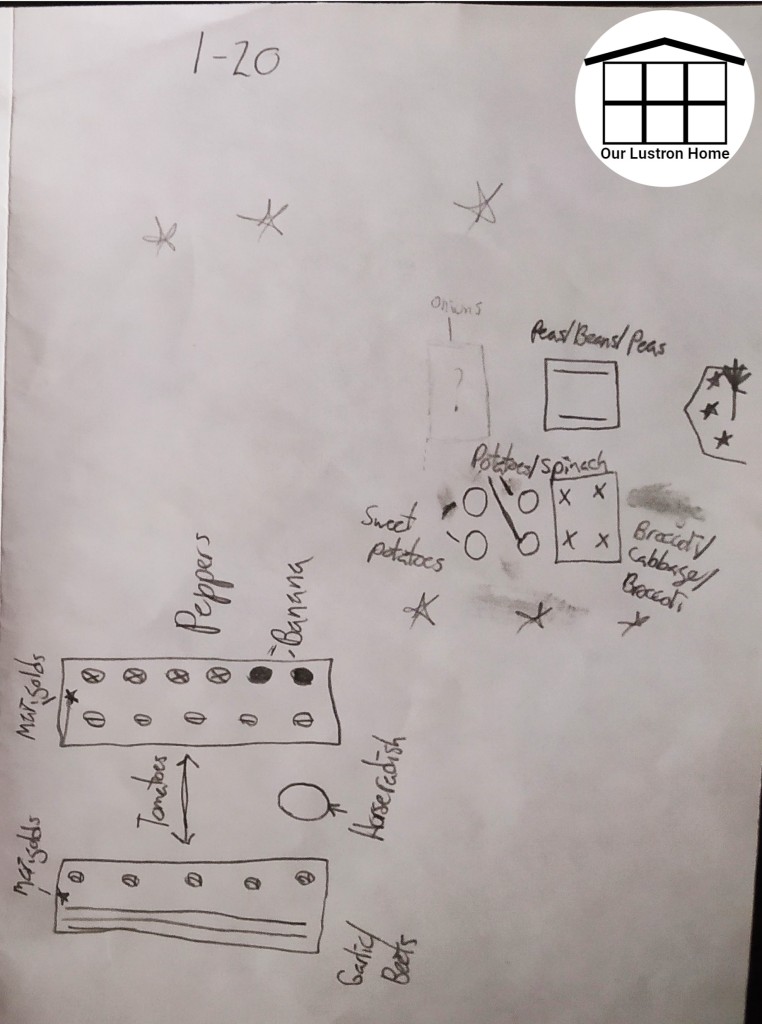
Those were just some of the basic changes that has helped me to grow as a home chef and as a person. Of course, we never thought we’d be in this situation, but we were glad to be partially prepared before, and thankful we needed very little during the thick of it. This time made us change our goals as a family. I discovered I had a huge love for gardening. This year was my first garden, and it was amazing. So, though we just bought this house less than 2 years ago, we do plan to eventually move to a property with more land for gardening, and maybe some small livestock.

In closing, what are somethings that are good to have on hand?

I’ve found canned meats to be helpful. I like to have a month’s worth of meat in the freezer at the beginning of each month. If you can can your own food, you definitely should, if not, know of good ways to keep what you have good in case of power outages. Fresh fruits and veggies don’t last long, but they are still necessary for a healthy diet, so having even some dehydrated fruit is good for emergencies. Flour is so versatile. Bread, cake, pizza crust, tortillas, and pasta, are a few foods to make with it. You can also use flour for thickening a sauce, coating your food for frying, and making batters. Another thing I like to have is evaporated milk. Condensed milk is sweetened while evaporated milk is just concentrated milk, all you need to do it thin it out with water, then you have a standard milk for whatever you need. Have an extra case of water in the house at all times, you never know if the well may stop working, or if the town needs to do maintenance on the water pipes. And finally, having a first aid kit is very helpful in an emergency. Though the situation may be stressful at the time, it’s nice to not have to worry about having a clean wrap because you should have one in your kit.

Thanks again for reading. I have a real passion for taking care of others and I hope this will give you inspiration for what you may need, or a glimpse into the mind of someone who likes to be prepared.

Advertisements

Garden Planning 2021

Advertisements

I’ve been planning my 2021 garden since fall and have altered the plans several times. It’s important to keep a record of your plans, and I so far have 5 sketches for my 2021 garden dating back to September. This year will be my second year with a garden, and I’m planning for a 3 season garden. This means I have plans for all seasons, Spring, Summer, and Fall, and plans on what goes well together and what will go in once one stops producing. With this planning also comes many decisions. I have decided to start everything from seeds except what doesn’t use seed. I have also decided to use two new small raised beds and to use two more fabric pots than last year, however since I flipped the beds this fall, I only have one of the five bags I need filled. I’ll also be figuring out how to fill them early this spring. The soil is very compact here and not very fertile. We do have a compost bin, but it is much too small to be a hot pile, so though there is some dirt at the bottom, it will take a very very long time before I’ll get any significant compost from it.

Advertisements

The Plans

As I mentioned these plans have changed and evolved over time. The first things I did when planning my garden were to make a list of all the vegetables we eat a lot of and we feel would be a fun challenge for the next year. I also sketched out a layout for the garden. Then I began to place the plants I really wanted into the sketch accounting for plant spacing. Then, when you get to your last few plants you have to make the decision of what you want to plant this year. Take into account, how much you currently have stored, how often you eat it, and if you will have the means to store certain vegetables over an extended period of time.

Advertisements

Once your vegetables are picked, you can tweak your plans over the span of a few weeks. However, when you finally are set on what you plan to grow, be sure to order seeds! Seeds are in a higher demand than normal and it could take a while to get seeds or for them to come back in stock. Beyond that, it will just be deciding when you can plant things, and what can be planted once one plant is ready to be pulled. For example, I already have my garlic in the ground and it came up before the hard freeze came, so I know that will be planted until late July when it will be time to harvest. After that, I will plant beets. I denoted that by a “/” on my sketch. I have several other plants I will be doing that with, I plant to plant Peas, once it gets warm, pull the peas and plant green beans, then come August/September, I’ll be able to plant a second planting of peas. I’ll be doing the same thing with my second new bed, but with two plantings of broccoli and one planting of cabbage. I also Plant to plant potatoes once the ground is warm, and once they are harvested, I will be planting Spinach in the fall. I am in zone 6A, so my timeline will likely be different than yours, however I hope you were able to get some helpful information.

Some possible questions you may have, I’ll try and answer before hand, but feel free to ask any questions you might have down in the comments. I’ll just hop into it. The circles not within a rectangle/square are my fabric pots. I plan to plant one with horseradish, two with sweet potatoes, and two with potatoes and spinach. The rectangles on the left side of the page are 4ft x 8ft beds that are 12 inches deep. These are the beds I started with last year. The square beds on the right of the page will be 4 ft x 4 ft beds, though they have not been constructed yet. There is also a possibility for another 4 ft x 8 ft bed for onions, but that will only happen if the cost of lumber comes down significantly before May. Most people in my area have a consensus not to plant anything in the ground before Memorial Day, however, plants like peas and broccoli are very cold hardy, so their spring planting will probably go into the ground beginning to mid-May. The picture above of dates and veggies underneath will be the days I will have to start my plants inside. For them, I will probably be starting them at the end of the time frame, just so they don’t get too big, if I do have to wait until mid- or late May before planting. What else… I will be planting two rows of tomatoes, and I’ll be doing one variety per row. I will also be planting both banana peppers and bell peppers in my pepper row. I have tons on Marigold seeds, so I’ll be starting them in every flower bed around my house, and I also learned to get them in the ground super early, or they won’t sprout. I learned the same with dill last year.

That’s all I can think to clarify. If you have any questions or comments, feel free to comment below! Thanks for reading!

Advertisements

Pork Dumplings

Advertisements

These dumplings are far from beautiful. Like pies and my prior attempts at pierogies, I am still bad a sealing foods. Don’t let these dumpling’s appearance fool you though, because these dumplings were very tasty! This recipe takes a while to make, so give yourself an hour of just prep time if you plan on making your own wrappers. You could also just by store wrappers and that will help a ton. Learn from my mistakes by taking the advice next. First, make sure your dough isn’t too sticky for your wrappers. If the dough tries to stick to your hand, add more flour. Finally, these will stick to the pan once all the liquid is out, so use a stiff spatula and scrape the bottom of the pan to get that nice crisp bottom. You could also steam them, but I don’t have a decent steamer basket, so this faux steaming will work for me. These dumplings are savory and have so much flavor. The soy dipping also helps even out the flavor and is necessary for this recipe. This recipe makes 20 dumplings or 3 adult servings.

What You Will Need

Wrappers

  • 1 1/2 Cups Flour
  • 1/2 Cup Warm Water
  • Rolling pin
  • Cling wrap

Filling

  • 1/2 lb Pork, ground
  • 1/2 Medium Onion, finely diced
  • 2 Garlic cloves, minced
  • Ginger paste
  • Sesame Oil
  • Mixing Bowl
  • Frying pan and Lid
  • Stiff Spatula
  • Soy sauce, for serving

Directions

Making Wrappers

1. Mix together in a bowl flour and water until the dough comes together. Knead until dough is smooth and elastic. Dough should not be sticky. Once dough is formed, wrap in cling wrap for 30 minutes to rest.

2. Once rested, turn out onto floured work surface. Divide into 20 balls and cover with cling wrap when not working with them. Roll out each ball into a 3 inch circle. Set aside on floured surface.

Making Pork Dumplings

  1. Mix together in a mixing bowl, pork, garlic, onion, ginger, and sesame oil.

2. In the center of your wrappers, add 1 Tbsp pork mixture. Fold in half and seal edges. Begin heating your frying pan over medium heat.

3. Once hot, add enough dumplings to fit in pan without touching. Add 1/3 cup water, and cover for 5 minutes and cook undisturbed. Remove the lid and cook until all the water disappears and the bottom of the pan begins to turn a dark brown. Remove from heat. Using spatula, free your dumplings from the pan, plate and serve.

Freezer Shredded Potatoes

Advertisements

Potatoes can be found easily this time of year. The other day, I posted about cubing and freezing potatoes, but this is another way of preserve potatoes. Shredded potatoes go well in casseroles, or fried as pancakes. These are also very easy to make and they take very little time to process and freeze. 8 medium potatoes will give you about half a gallon of shredded potatoes. I made 2 batches at once, and I froze each meal individually, since they freeze into a solid block.

What You Will Need

  • 4 Medium Potatoes, Cleaned
  • Shredder attachment for food processor/mixer, or Cheese grater
  • Dutch Oven
  • Large Bowl with Ice Water
  • Strainer
  • Freezer bag/Vacuum Seal bag

Directions

1.Clean your potatoes and shred using your shredder. In a dutch oven, fill 3/4 full with water and bring to a full boil. Prepare your Ice water.

2. Add the potatoes to the boiling water a handful at a time. Once added, boil for 1 minute. Strain and add to ice water.

3. Once cool, strain again, and let strain for 30 minutes, stirring every 10 minutes. Transfer potatoes into a freezer bag/vacuum bag. Remove air from bag, label, and freeze. This is enough for one serving, if you want smaller servings, freeze separately.

Advertisements

Freezer Cubed Potatoes

Advertisements

Potatoes can be found easily this time of year. If you’ve already harvested, or know a local farmer, you too may also be facing a surplus of potatoes. Last year, I bought 25 lbs from a local farmer. This year, we decided to buy 30 lbs with how discounted they were. So, this is one of the ways we decided to preserve potatoes; cubing, blanching, cooling, straining, then freezing. I use these potatoes for many meals. I mostly use cubed potatoes for mashed potatoes, and a base for creamed dried beef, but there are many things you can do with your potatoes once they reach this point. You can bake or fry them from this point too. 6-8 medium potatoes will give you about half a gallon of diced potatoes. I added 2 batches to the bag below, but you will want to freeze each meal individually, since they freeze into a solid block that will not break apart easily if you only wanted to use half at a time.

What You Will Need

  • 6-8 Medium Potatoes, Cleaned, Peeled, and diced into about 1 inch cubes
  • Dutch Oven
  • Large Bowl with Ice Water
  • Strainer
  • Freezer bags/Vacuum Seal bags

Directions

1.Prepare your potatoes. In a dutch oven, fill 3/4 full with water and bring to a full boil. Prepare your Ice water.

2. Add the potatoes to the boiling water a handful at a time. Once added, boil for 7 minutes. Strain and add to ice water. Once cool, strain again, and let strain for 10 minutes.

3. Once strained, transfer potatoes into a freezer bag/vacuum bag. Remove air from bag, label, and freeze. This is enough for one serving, if you want smaller servings, freeze separately.

Advertisements

Website Powered by WordPress.com.

Up ↑

Design a site like this with WordPress.com
Get started