If you’ve been following for a while, you may remember that at the beginning of quarantine, my husband and I bought flooring. We bought enough flooring for the entire house, and if you want to read more about that, you can find it here.
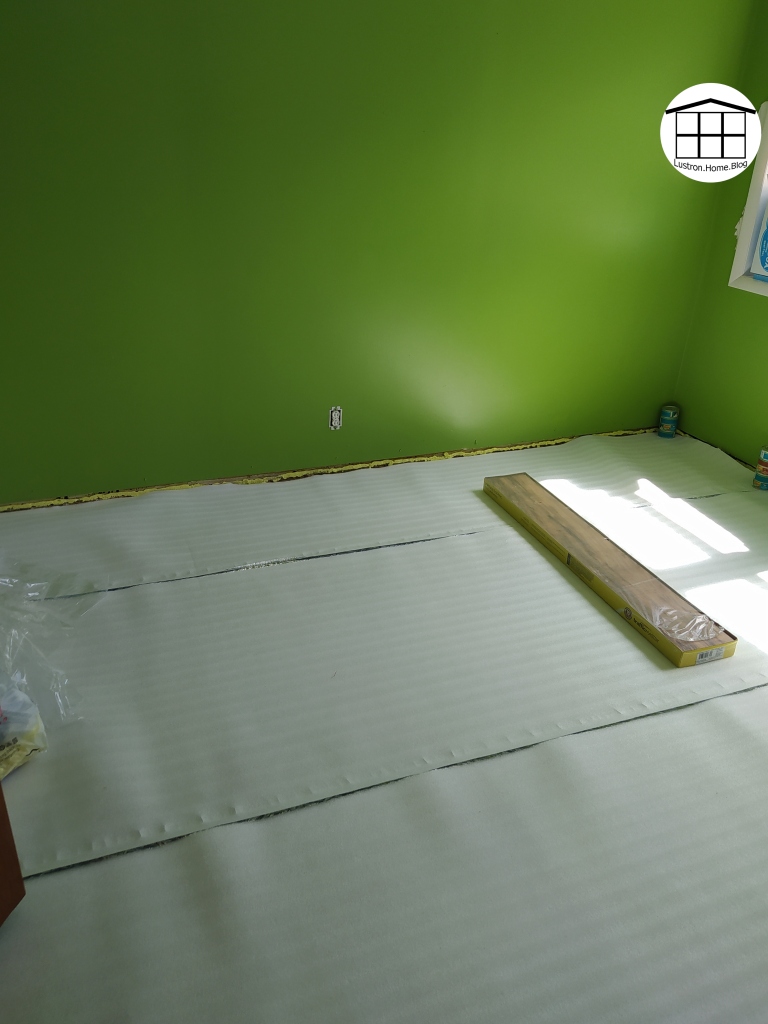
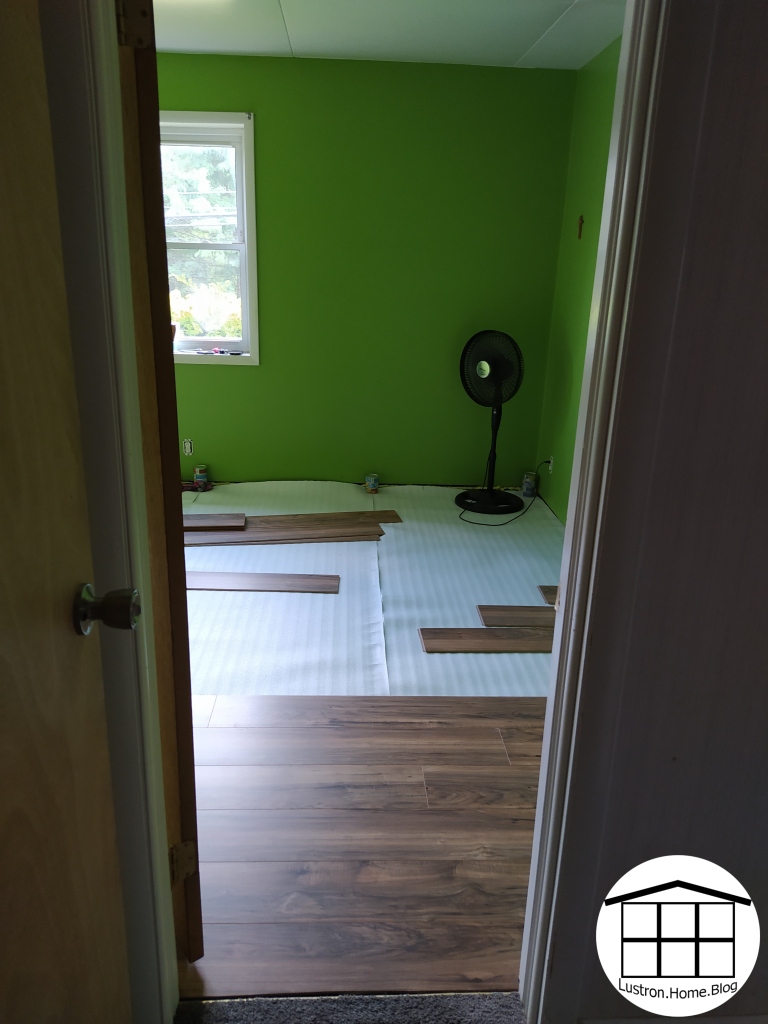
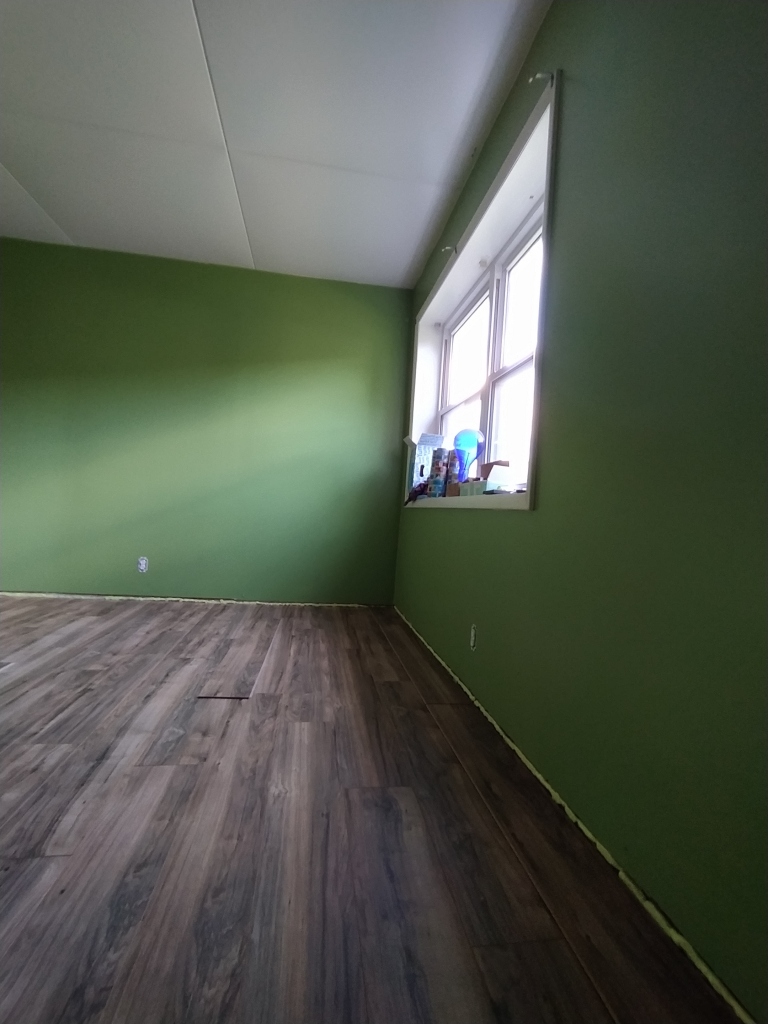
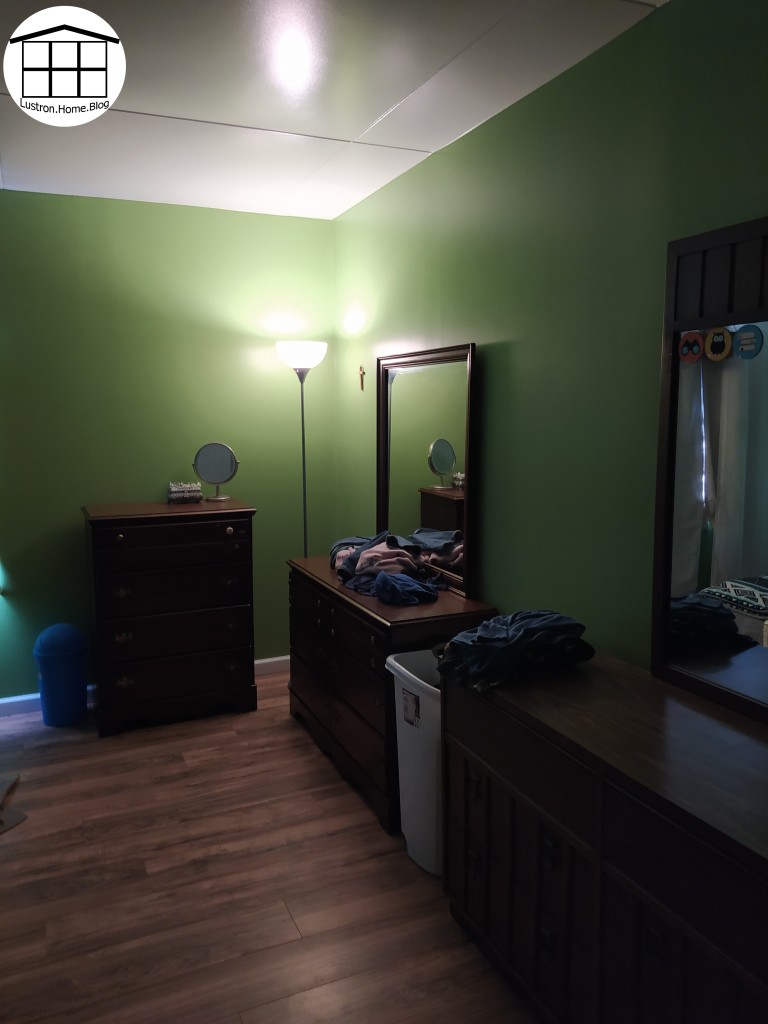
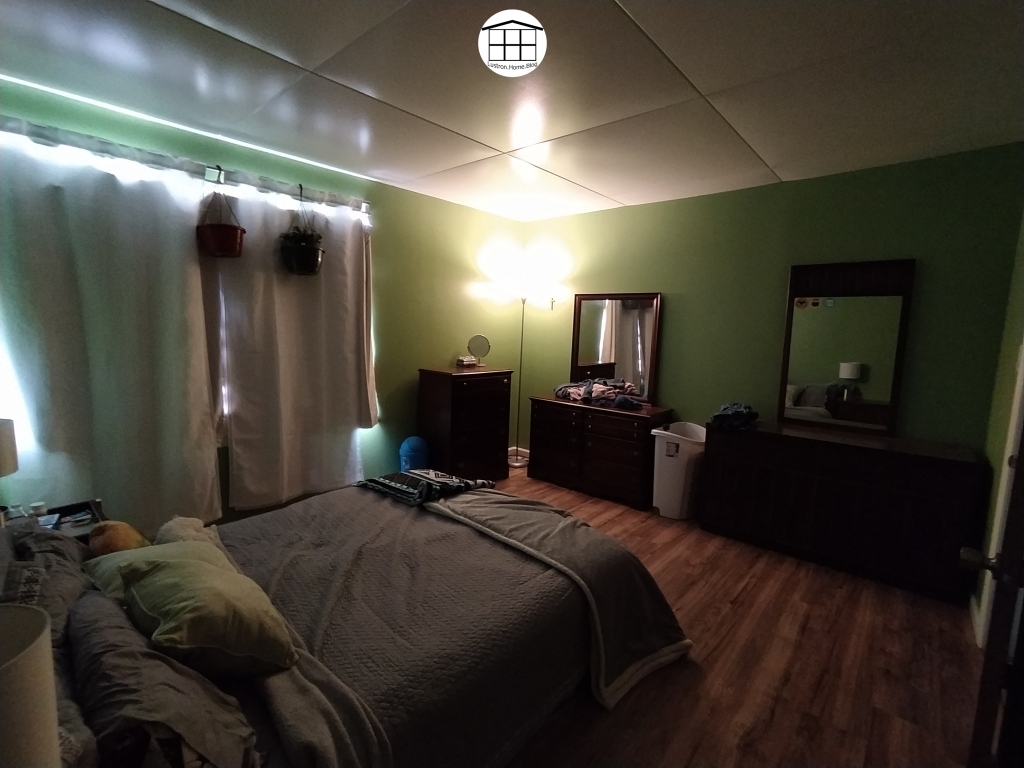
Up until now, I have only posted our guest room being done, however, we had also started our master room, and now it is finished. The process we went through was the same as our guest room, so if you would like to visit that, you can by clicking here.
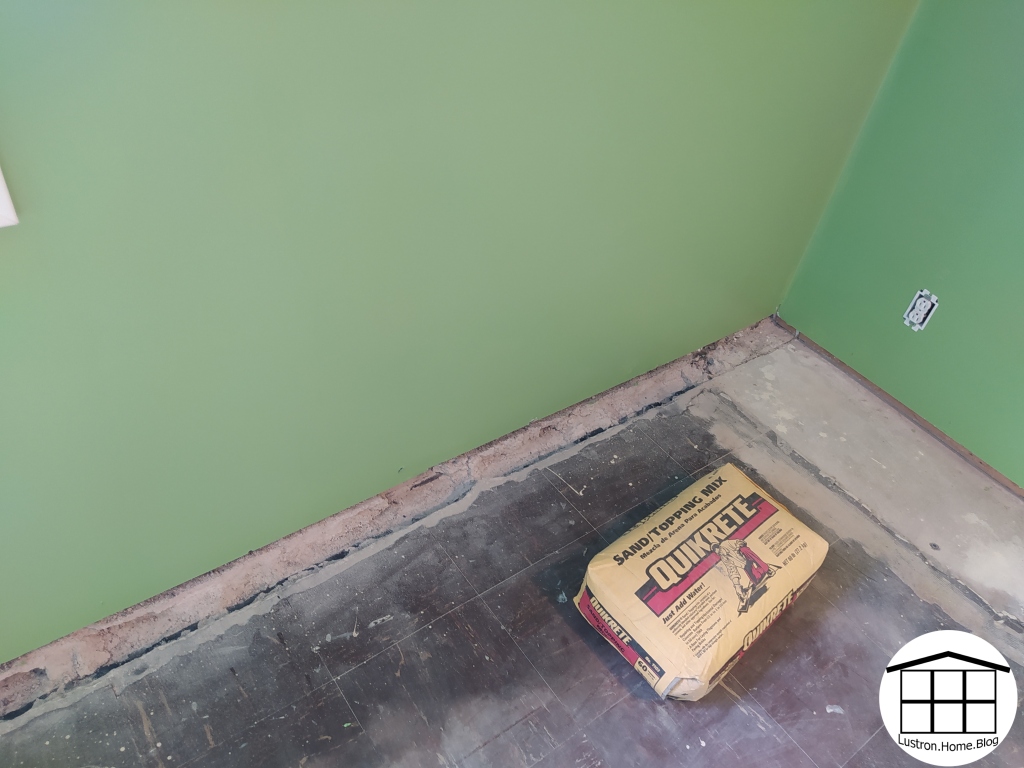
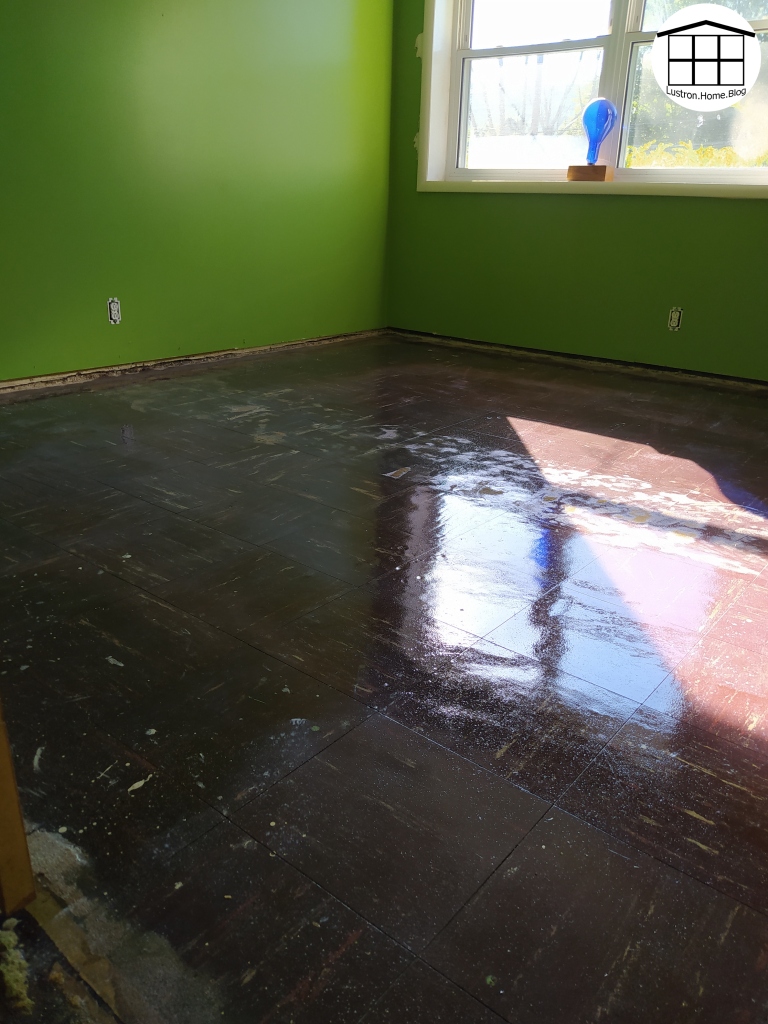
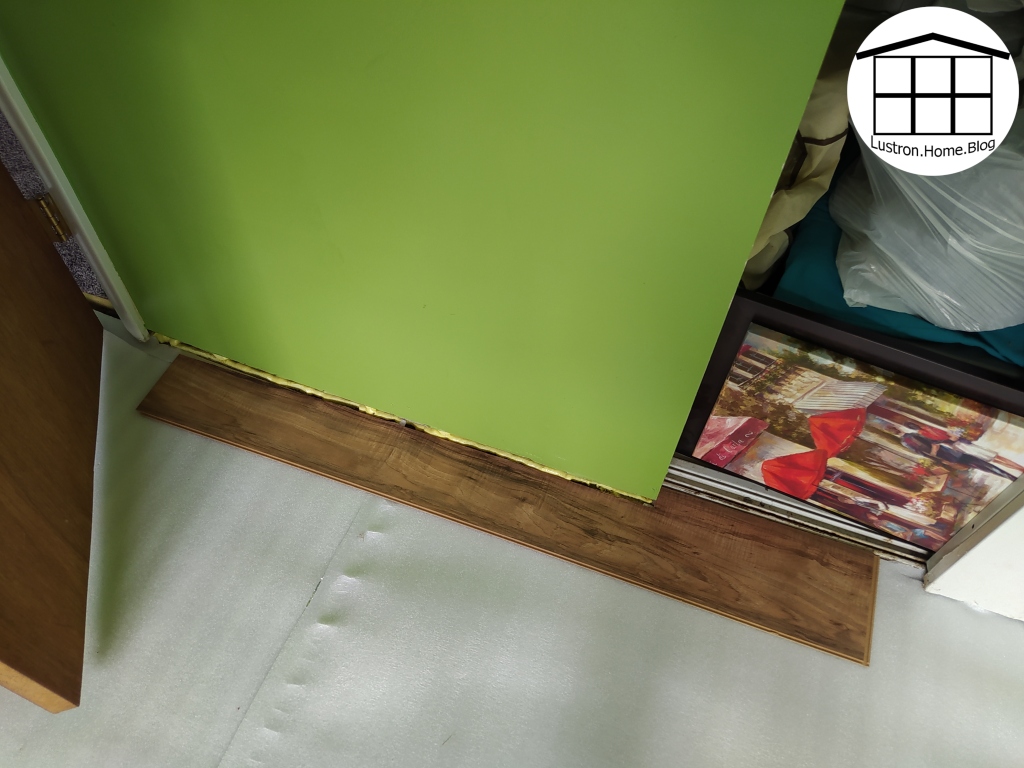
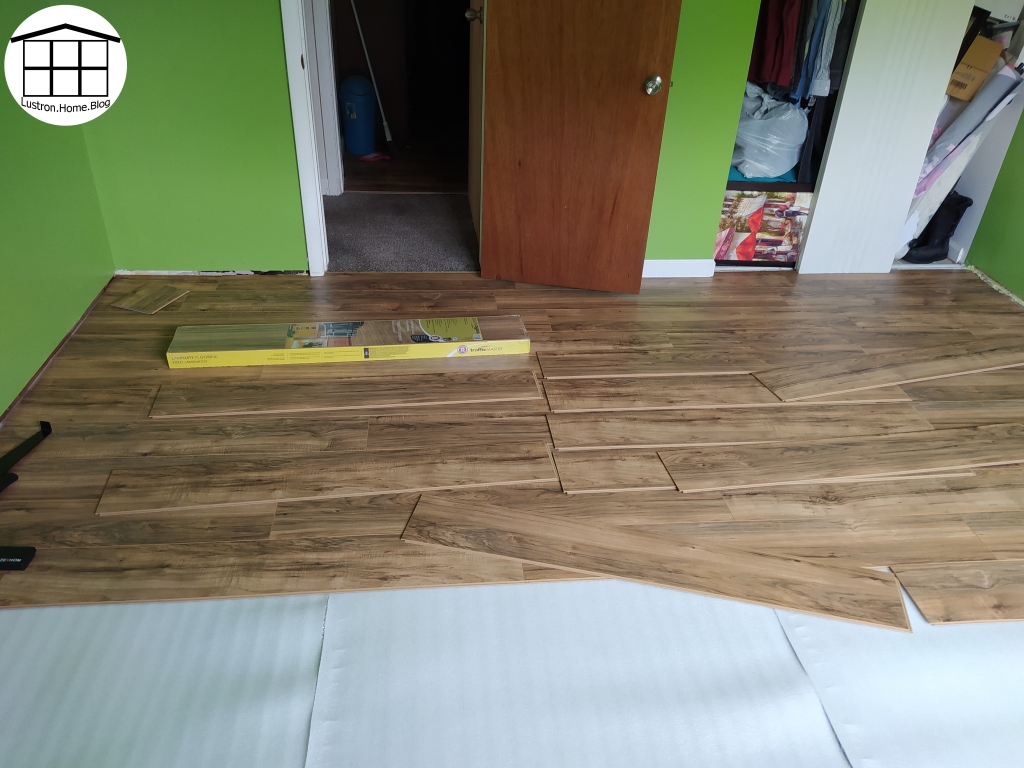
Differences with our master was, I painted the walls before I painted the floor, and the floor was in much worse condition than the guest room. There was quite a bit of mold/mildew on the bottom of the underlayment. The underlayment was also much different from the guest room with a plastic coated foam instead of the exposed porous foam that was in the guest room. Many floor tiles were also loose, but they all sealed back down with the coating of sealant paint. The only other hiccups that occurred doing this room where the fact that the walls were never primed, so in one spot when we were removing the painter’s tape, the old paint pulled off the wall in two small spots, and since the first row of flooring wasn’t perfectly straight and we were tapping boards a lot more than last time, we were having trouble getting the boards to lock together fully about 3/4 of the way through.
Removing Old Carpet
Painting Walls, Chipped Out Cement Edge, and Filling with New Flat Cement
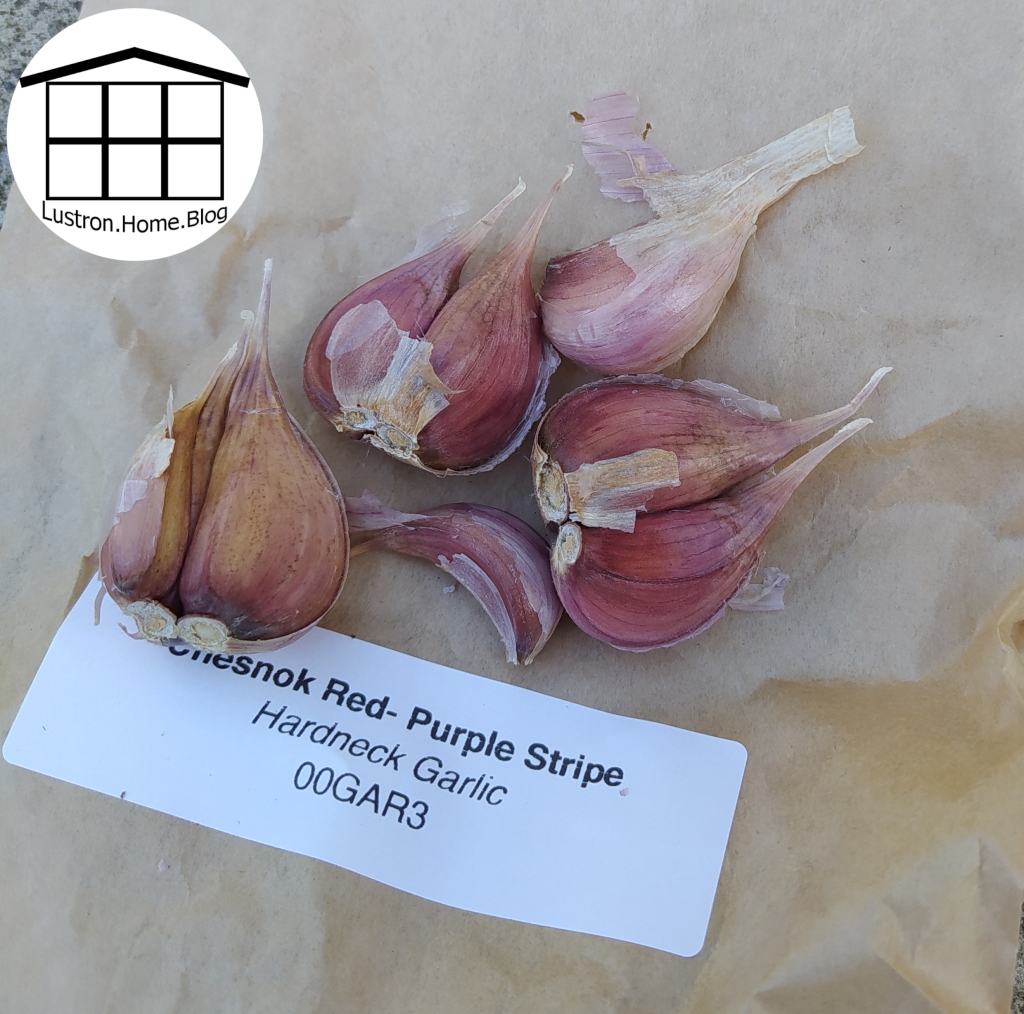
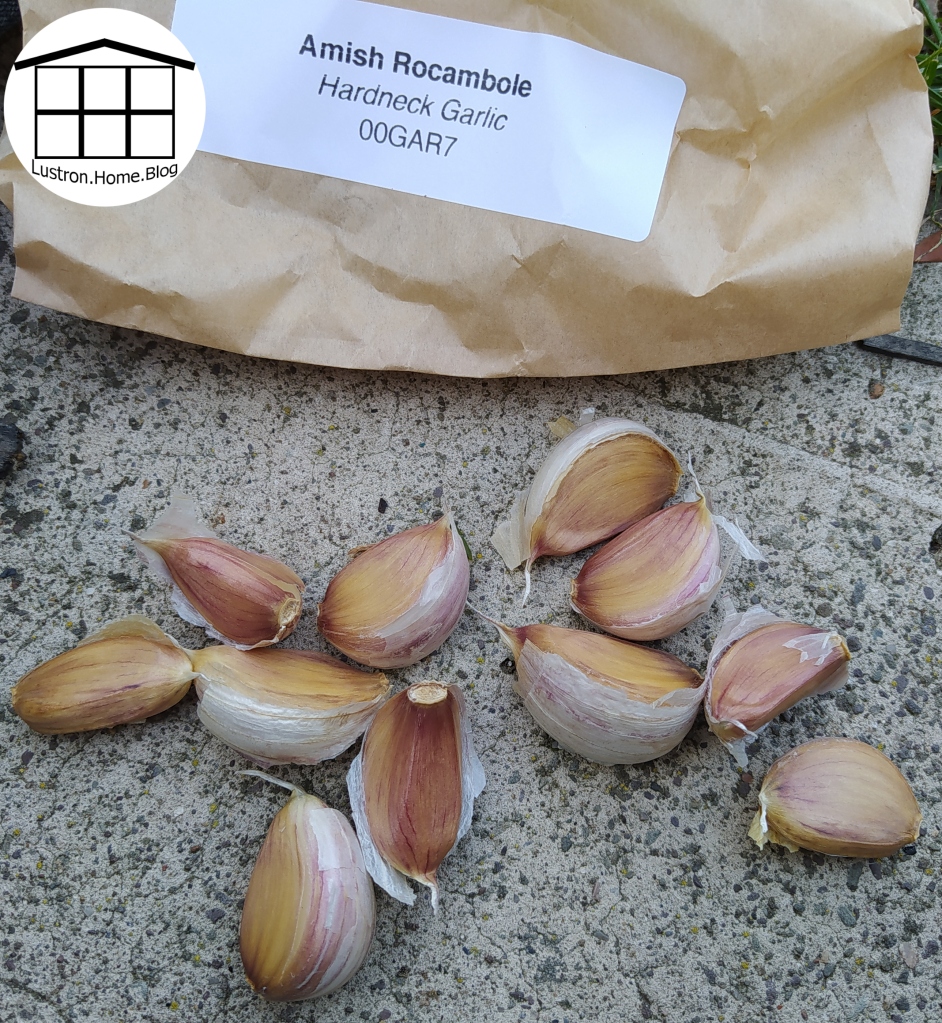
If you follow me on Facebook, you may have seen the post I added yesterday about planting garlic. This is the first year I am seriously trying to grow garlic, and so I’ve done a lot of research and I’m very excited to see what I can get. But, isn’t this garlic gorgeous! I bought these three varieties, all three are organic, disease free, and heirloom varieties. These varieties cam from MIGardener.com. They are not a sponsor, and many varieties are sold out or selling out fast. With that out of the way, before I could plant my garlic, I first had to pull my remaining plants from my raised beds and fabric bags. With this, I was able to save several Parris Island lettuce seeds. I will include those steps at the bottom of this post. I then amended my raised beds, then I planted my garlic.
My first frost day is only 2 weeks away when I planted the garlic yesterday. It is recommended planting garlic at least 3 weeks before first frost, but we just got over a cold snap yesterday where we had 4 nights of frost. The weather is calling for warm temperatures for the next week, so I’m taking a gamble that we won’t be getting another frost for a couple more weeks.
To amend my beds, I first pulled all my plants, but my marigolds. It was just a personal choice to keep them. I think they are beautiful and have a lot of life left in them, so it didn’t feel right pulling them yet, so I just worked around them. To make up for this, I will add some fertilizer in their place next spring to add more nutrients in those spots. Once I pulled the plants, I then pulled down all my netting. This made it easier to move the soil around. Our beds are 8 ft by 4 ft and pressure treated. We added in one fabric bag to one bed and two fabric bags to the other bed. We then split a bag of peat moss between the two beds. We also added 2 bags of aged cow manure into each bed and mixed it all into the top 4 inches of each bed. The reason we added the fabric bags was because the dirt in them had a lot of clay and dried out very quickly. We added 2 bags to one bed because the soil in that second bed was very poor, so we wanted more organic matter in the bed, so we added more dirt. You could also add potting soil if you needed to fill your beds more, but potting soil is expensive, so if top soil were an option, it would be better. I aim for a ratio of 1/3 peat moss, 1/3 compost/manure, and 1/3 top soil for a healthy and balanced soil.
Plant garlic rows 6 inches apart
Plant garlic cloves 6 inches apart in a row
Place garlic cloves 2-3 inches under ground
Cover garlic with 4-6 inches of hay or mulch before your first frost
Plant garlic at least 3 weeks before your first frost to allow time for root development before they go into dormancy
Place chicken wire/hardware cloth over your beds to prevent animals from digging
Uncover garlic once risk of frost has passed
Water garlic often in the fall and spring and fertilize often in the spring and summer; garlic is a heavy feeder
Garlic is ready once the outer 1-2 leafs are dead and dry, any more than that and the garlic won’t dry and will just rot instead
Parris Island lettuce makes yellow flowers, that once fertilized become white fluffs with seeds attached. To get the seed, simply remove the heads that have already gone to seed, remove the stem, then remove the fluff from the seed. You only need a few flowers to get lots of seeds.
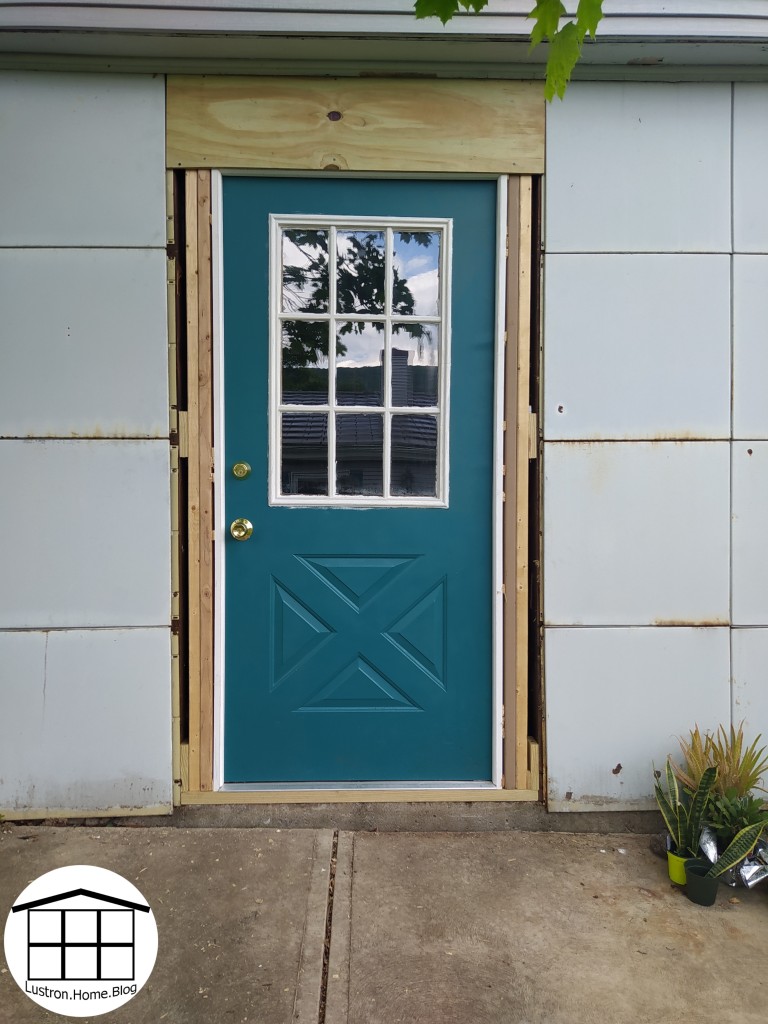
We started this project near the end of June, and by early July we had everything done but painting the trim. Though I like to make a post whenever we do a project, I am learning to wait until the entire project is done instead of posting when everything is “mostly” done. So, the end of August, we got some exterior paint and were able to finish this project. We’ve been working on other projects almost constantly, so it was something we had to get back around to.
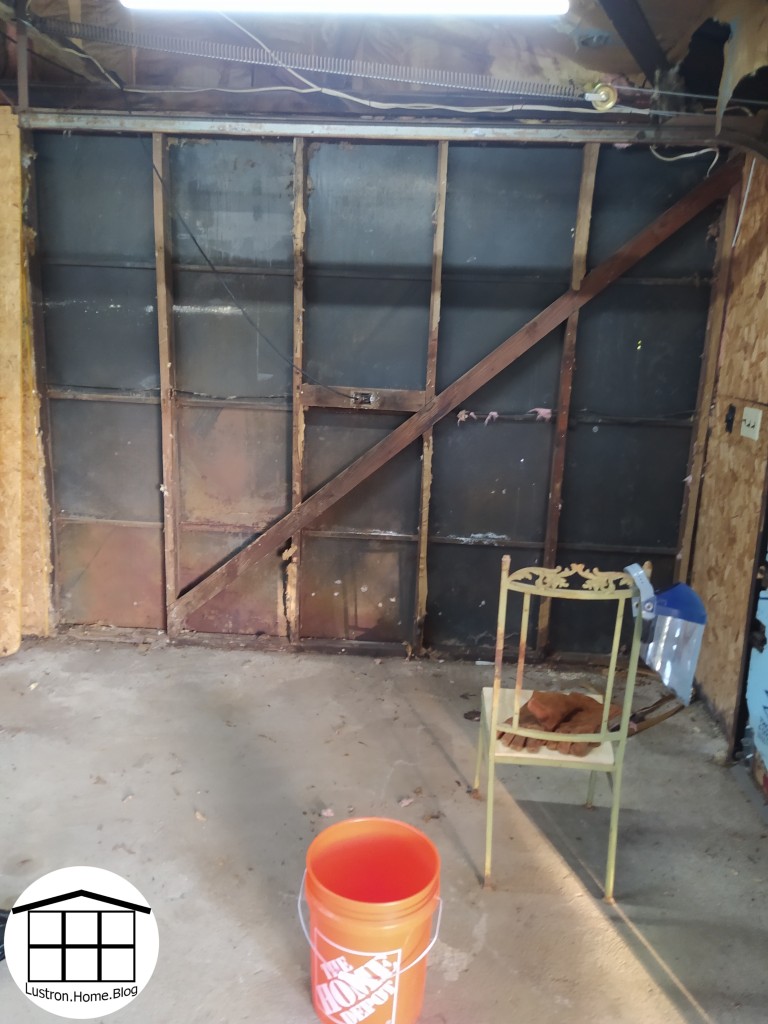
Lustron garages are similar to the house, but there are some construction differences. For example, the house is entirely steel construction, whereas the garage is all wood construction. This made it much easier for us to add the door. The panels are the same between the house and the garage. The panels are attached in only three corners, and what keeps it together is the panels being nested. from the front, the panels are bolted on the left corners and the right top corner. When the wall was assembled, it was assembled from the left bottom corner to the right top corner. The metal shingles are also the same as the house, however the roof design is different. Lustron garages were a secondary thought to this company, and most of the time were just assembled by some contractor the way they would build any other structure. For that reason, you will find must more variation between garages than houses. With that out of the way, you can look through how we added our door. We bought a previously owned steel door for $15 that came with hinges, but was not hung. We would have liked a door that was already hung, however we didn’t want to spend a fortune on a door either, so we went with what we could find, I painted it, and we attached to a door frame that we made ourselves.
The first thing we did was figure out where-ish we wanted our opening. We had originally planned to more the door so there were two existing panels between the door and the corner. We knew we’d have to move our electrical if we did that, but there would be enough room for the upright freezer and some storage shelves. When we pulled down the wall and could see the footer, there was already an original foundation anchor in it, and though we may have been able to remove it, we didn’t want to mess with the original structural integrity. Before you pull down your wall, you will need to find your studs, but once you do, you can tear out anything in the wall, in our case it was insulation, and clean your work space.
We decided to move the door a segment to the left, and Josh began cutting. As I mentioned earlier, since the panels were assembled a special way, we had to disassemble a special way. Using a sawzall, Josh was able to fit the blade between the panels and studs to cut the bolts. Once all a panel’s bolts were cut, it could just slide right out. We did end up damaging a few panels this way, but many of these panels were severely rusted and some even rusted through. Once that was done, we cut out the existing stud and cross support, and cut the existing footer in the door way to make room for a new threshold.
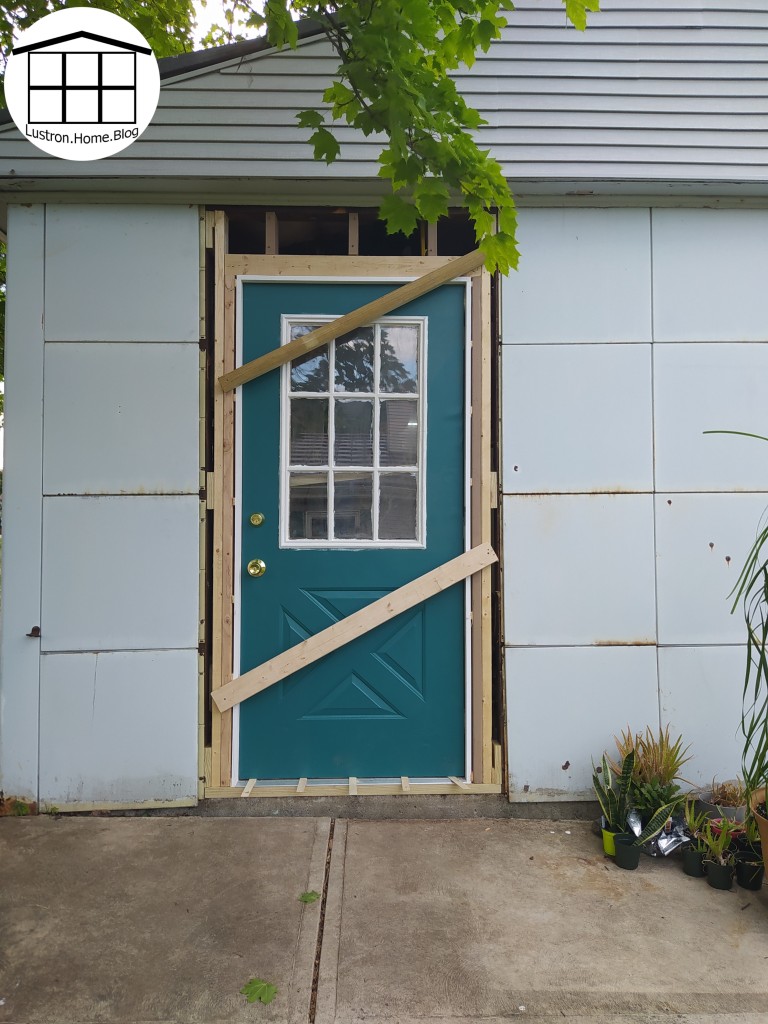
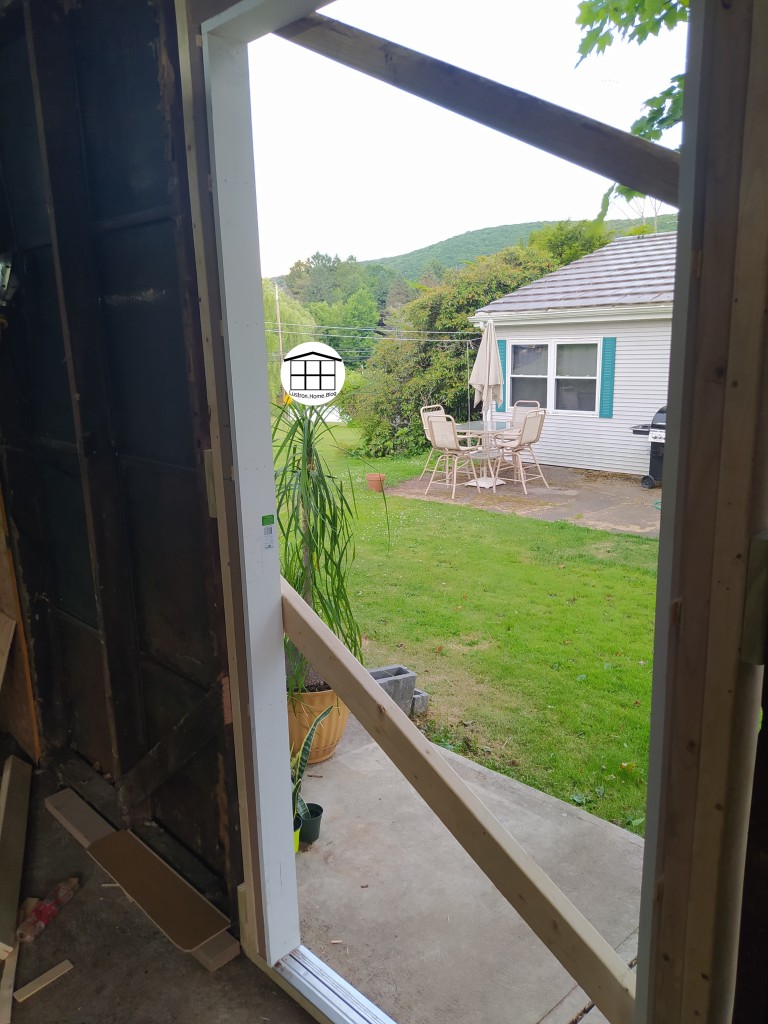
Once the opening was done, it was all framing and adding the door. First, we added our threshold, and added on anchor into the cement. Then we rough framed the door. We gave ourselves an extra 3 inches for the door and roughed in the opening. We made spacer blocks then added our 2x4s up to the header. There we added shorter 2x4s that were slightly higher than the door, and nailed them to the existing 2x4s. This whole time before we nailed anything, we were adjusting the boards to be as close to level and as close to square as we could get. We added a top plate to the shorted boards and attached it. We added some smaller pieces to attach that to the actual header, then we called it a day because our we found out our well switch had broken (thankfully we keep a spare). We added plywood for the night and got back to it a few days later. We then cut the door frame, cutting the sides before the top, shimmed it in place then nailed it. We added our final threshold and then we took a few more days off before returning. When we came back, we hung the door. First, holding the door where it would be if it were open, we marked the hinge locations. We had enough room that we didn’t have to set in the hinges, but you may have to do that if your space is too tight. Josh pre-drilled the holes, and I held the door as he attached each hinge.
Josh then cut our top trim piece and mounted it, then he cut and mounted each side piece. We added new hardware to the door, and spray foamed around the framing of the door. We left it like that until I was able to paint the trim to finish the project.
As a first year gardener, I don’t know much about gardening. As a result, I do lots of research and planning, and even still it seems with gardening you just have to learn from your mistakes. The first frost is coming this weekend and I’ve already retired most of my garden. There are a few radishes in the ground still forming, green tomatoes sitting on the vine, and the lettuce flowers beginning to open. The only color that remains in my garden is three marigolds that are still thriving despite the temperatures. My house plants will be coming inside tonight to prepare for the frost, and soon my husband and will be struggling to find enough room to keep them for another winter.
There are so many things I wanted to do in the garden still, but yet the first frost is nearly here. I was able to amend one raised bed. I added manure and peat moss. I mixed it into the top few inches, and covered it with another thin layer of mulch. I had planned to plant garlic this fall, but with the first frost among us, it is likely too late. I may still try to get it in the ground, but we will have to see if it will warm back up at night after this frost. And to protect it from the frost, we’ll likely use hay bales to protect from frost. We’ll have to see when it comes.
I have a small patch of dill growing that I planted this fall. My tomatoes and lettuce will also be adversely affected by the frost. Once they are done, we will amend that bed too with more manure and peat moss. My biggest lesson this year was to keep healthy soil. My tomatoes performed poorly in comparison to most everyone, and though I want to blame the very dry and hot summer, I am sure the poor quality soil played the largest part in that. We also learned our lesson with netting, and that chicken wire is superior to a plastic net that can still let in all sorts of critters.
Advertisements
Much thought has been going into a garden for next growing season as well. I am researching when to pull crops and when to plant new, when to start seedlings inside, and what crops do well in the spot of another crop. The plans have become more finalized, and I think I found a setup I prefer. Researching, I found a new way to string up beans/peas. It includes making a wooden frame, then using 100% cotton string as the trellis. This is a huge improvement from the plastic and metal my beans grew through this year. Pulling my beans took so long because of all the tangling and growing into the plastic. So this way of trellising will be an improvement and pulling the plants will be way easier too, and the string 100% cotton can be composted, unlike plastics or other artificial materials.
If I do get my garlic soon, I will do a post about that, but otherwise, my garden is just about done for the year. Thank you to everyone who has been seeing and checking up on my progress. Gardening has been a lot of fun and I am very excited to see what next year holds!
Hello, and welcome to another one of my garden updates. My last update was for May, and this one is for June. (Sorry it’s a bit later than the last one.) My garden has grown so fast, it’s shocking! I’ve gotten some radishes and lettuce off my plants, and this weekend I was able to get some cucumbers off my plants too.
This last month I’ve learned some valuable lessons. First, and I mentioned it in my last post, it is so important to space radishes. I tried to get them high density, just it just grew into a mess, and it took about 2 weeks longer to get any. Also, the two pictures below of harvested radishes is all the radishes I was able to harvest out of that mess. I had several radishes break under the soil and begin to rot, and I had many many more that produced no bulb due to overcrowding.
Second, I’ve discovered that cucumbers are a handful! I’ve been trying to grow them vertically, tying them to a tomato cage. And, though that works, They don’t climb naturally well, so I find myself every 1-2 days in the garden directing and tying off my cucumber plants. I also trimmed off some of the lower leaves off my cucumbers. They were turning yellow and dying, and they were also restricting air flow and making it hard to see any low hanging cucumbers.
Third, I learned all spacing needs to be respected more. I planted my green beans and cucumbers about 18 inches apart, and you’d swear they are star-crossed lovers. I go out into my garden everyday, and I always see these two plants reaching for one another, and being less than an inch from becoming a tangled mess I don’t look forward to dealing with. However, my other bed of lettuce, Swiss chard, tomatoes, and onions aren’t having any crowding issues. My Swiss chard didn’t come up. I believe I waited too long to plant. I also planted another segment of lettuce, and that also didn’t come up, I’m assuming same problem. My onions in that bed have appeared to stop growing. They are tinier than the other bed despite being planted earlier. They tops have also begun to fall over on several in that bed, leading me to believe pour drainage is likely a problem. I have several tomatoes that are nice and big, however none have begun to turn red yet. I also have one that a bug got into, but that’s not bad.
Fourth, I’ve learned good soil and drainage is important. As I just mentioned, my one bed isn’t holding onions, and I’m positive that if it isn’t holding onto moisture too much, the soil is likely not giving them enough nutrients. This bed was filled with mostly decomposed mulch, so the soil isn’t as good as my other bed. Besides that, the fabric bags we filled using soil from my in-law’s house, and their soil has a very high clay content. Because of this, in the hot June/July weather, I have to go and water them about every other day, when I see the leaves really wilting.
I’ve gotten everything planted and going. Some things aren’t growing as well as others, but I’m learning. We got a peach tree about 2 weeks ago and got that into the ground. I also left a few radishes to go to seed, and I have 2 onion sets going to seed now.
Ive also fertilized my soil about 3 times. I’ve been using Miracle Grow plant food for vegetables. Between that, watering regularly, and all the warm weather, my veggies have grown so fast!