One Year Update

Listing Photos

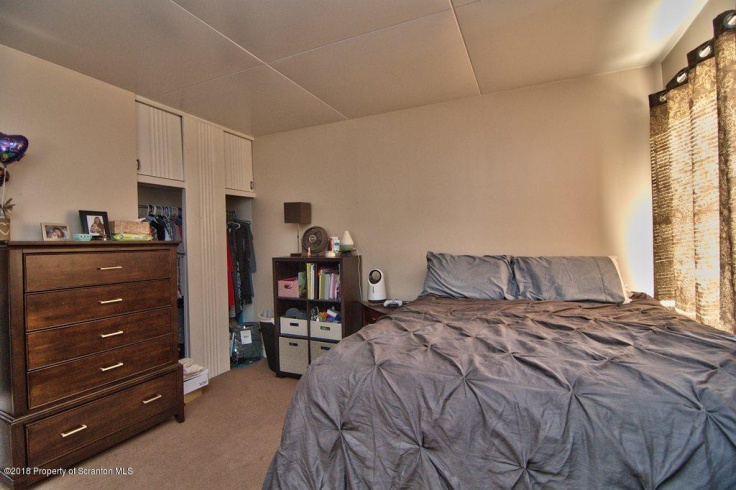
It all started with my Starting Point post. There I wrote my initial thoughts and ideas for this house as recorded last November. We bought this house and found many things wrong with it. We starting putting work into the house starting last October/November, and below is what we were able to accomplish so far.

Current Progress

As you can see just between the first set of photos and the second, we’ve made some big changes. We removes trees and bushes, put in raised beds, added an exterior door on the garage, and changed the accent color on the house from red to teal. Inside, we removed a lot of the latex paint off the utility room walls, we built and removed our builtin pantry, and installed a storage shelf instead. We removed the broken dishwasher and sealed the space to be used for my canning stuff. We also upgraded the light in the kitchen, painted cabinets, remove the old range microwave and added a new range-hood, as well as replaced the old leaking kitchen faucet. In the dining room, we refinished the wall after removing about 1/3 of the wallpaper in the house, and we also created a lampshade for our single handing bulb from a lantern we used at our wedding reception. We haven’t done too much to the living room yet; we added a projector screen and are mainly using it for storing some of our extra stuff until we finish the master bedroom. We replaced the light fixture in the hall, and upgraded all the light switches in the house to the rocker style. We repainted the bathroom, removed the medicine cabinet, changed the light fixture, and painted the vanity and changed the hardware. We also added a new shower curtain to match. In the original green room, due to it’s carpet color, we originally replaced the floor in the closet with vinyl planking. After seeing how easy it was, we took on the task of redoing the entire rooms floor, which was not an easy task. we remove the wood from the closet to be replaced with matching floor eventually, I also painted the bedroom the two shades of orange, we moved in, and that is the state of our orange room. Finally, our current project is the master bedroom, or our new green room. We just finished laying the flooring on Saturday. There is still a lot of work we want to do in that room before the new unveiling, but I hope this helps build some excitement for the next unveiling, which will be coming in the next two weeks or so.

A Year’s Worth of Projects

A year is so long, yet so short. We were able to accomplish so much because of the blessing we’ve received this year and from taking things in stride. We are happy for our new experiences and are content with this house even as we continue to find more problems. We aren’t sure if we’ll keep this house forever, but we are happy for all the good things this house is providing for us. This Lustron gives my husband and I something to do together, to bond over, and to dream for. We hope for nothing but the best for this house in the future, and we hope our fingerprint on this house improves the beauty of this old Lustron, rather than hinders it’s potential.

For more on our home improvement posts from this year, feel free to check out any of this posts below. If not, I’ll see you again soon!

Starting Point

New Light Fixtures

New Kitchen Faucet

Update and Mistakes

DIY Hidden Pantry

New Dining Room Light

Removing Wallpaper

Closet Work

Bathroom Transformation

Dishwasher to Storage

Kitchen Cabinet Updating

Raised Beds

New Kitchen Vent Hood

A New Big Project: Laminate Plank Flooring

Green Room Flooring

Finishing Our Guest Room

New Kitchen Shelf

Dishwasher to Storage

We’ve been working on this project on and off for several months now. Our dishwasher died in December and rather than have a broken machine in our kitchen, we decided it would be better to have the extra storage. Here I’ve split up the process into the big steps that we took.

Removing Dish Washer

First, we had to remove our dishwasher. We turned off the water near the dishwasher, remove the foot board, and lower the dishwasher. We then pulled out the machine, unhooked the water and drainage pipes, and we fully removed the dishwasher from our house.

Capping Garbage Disposal

The drainage for the dishwasher came into our garbage disposal. This posed an issue since the garbage disposal usually had a metal plug that would keep it sealed, but once it is popped out, there is no way to reattach it even if you kept the tab. We ended up using a rubber foot for protecting a chair leg and used a hose clamp to attach it onto the arm of the garbage disposal.

Making Walls, Bottom Shelf, & Painting

We were left with a mess. There was a hole in the left wall there the hoses were run to/from the water supply, and there were live wires for that was the dishwasher. First, Josh capped off each wire and wrapped it with electrical tape (the universal sign for a live wire), we then attached it out of the way. We got it so our water was no longer leaking and so that we won’t have to worry about them leaking again any time soon. We cut out the section of damaged wall, cut a piece of plywood to fit, and attached it with glue, filled the crack with a glue and sawdust mixture, plastered the wall, and sanded it flat. We used MDF to create a false wall in the back. We used brackets to wedge it against the wall since we didn’t want to put screws into our metal walls. We then made the bottom shelf with plywood and 2 2×4 feet that ran the width of the gap, with one placed in alignment with the cabinets on either side. This made a consistent kick board along the ground. Finally, we glued in the shelf to the cement, and we calked in the shelf and painted everything white.

Making Curtain Rod and Shelves

Josh made a holder for the curtain rod. He used 1/2 inch wood to create mounting points on either end. He drilled into each a hole for 1/2 inch conduit, and that would be my curtain rod. I had a set of extra curtains from college, so I added one panel, sewed it to the correct length, then attached the curtain rod. The mounting points for the curtain rod don’t have an option to simply remove the rod at this point, but we plan to rework this in the future. You can also just order a small tensions rod off the internet as long as you have the measurements. Finally, Josh took some aluminum angle to make the mounts for the selves. He drilled 3 holes to attache each to the sides of the cabinets and he added some on top if i even want to attach the shelves permanently. I picked the height I wanted, Josh cut 23/32 inch plywood to be shelves, I added 2 coats of white paint to everything, installed, and reorganized.

Final Product

Update and Mistakes

Josh and I have been working on multiple big projects since Christmas. We’ve been working to get a bit more DIY content on the blog, but we’ve found it’s just a little too hard to do some of these projects in winter.

We’ve pulled out our old dishwasher, since it stopped working mid-November, and though we would like another one eventually, we just don’t have the money or the options at this point to get another one, even used. So, we’re trying to come up with a plan for the now hole under our cabinets. We’ve also been working on a hidden roll out pantry. We started this project on the First, but we’ve been delayed a bit and it’s been taking a few days to finish it up, but hopefully, it will be up by Friday, fingers crossed! Finally, our big mistake.

We’ve been working on removing wallpaper for a few weeks now. But, there is a spot where they plastered over wallpaper, so we decided sanding would be the best option. So, last night we decided to sand down the wall, and though it looks great now, I think I’m going to go crazy with how much plaster dust is covering EVERYTHING! I’ve seen some forums talking about this problem and they encourage washing all fabrics and wet wiping down all surfaces, but man! It’s so much! So, if you ever attack a project like this, please, wear face masks (we did that atleast), make sure the room is well ventilated and sealed off from other rooms if possible, and try not to get frustrated with the mess you just made!

Website Powered by WordPress.com.

Up ↑

Design a site like this with WordPress.com
Get started