Home Update

Advertisements

It’s been a while since I’ve updated on how the house is going. So far we haven’t been able to do any more new flooring. The holidays and winter in general has made it hard for us to continue that project. Our next flooring room will be to add the new flooring into the orange room’s closet, then we’ll be doing the hallway and hall closet as our second segment. We are still trying to make decisions on whether we can do the living room and dining room together or whether we have to add a threshold, or if it would be easier to add one. Our living room is about 14 ft by 16 ft, and our dining room is about 9 ft by 7 ft.

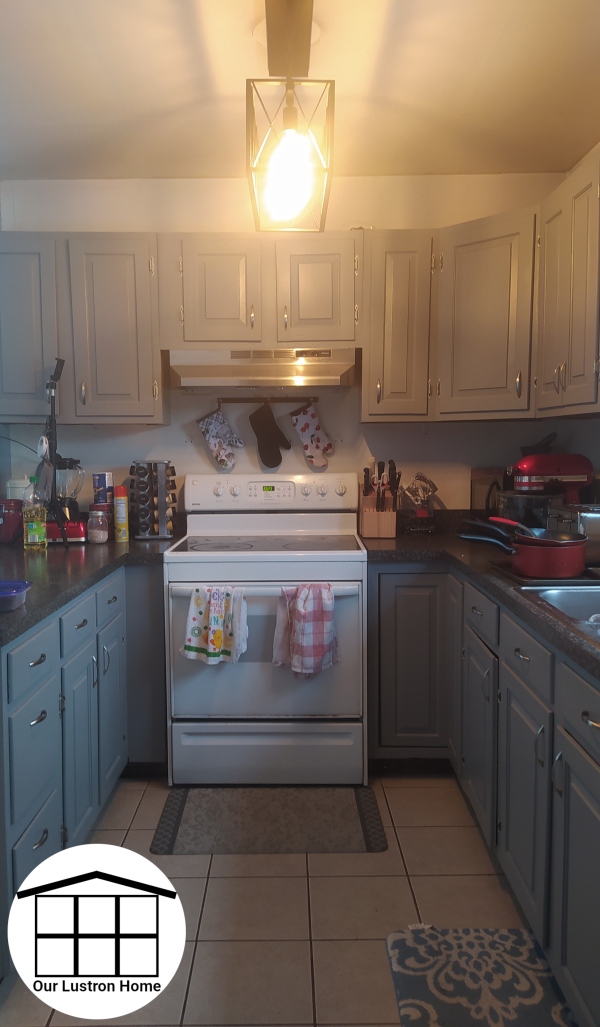
Otherwise, we have been working on projects. We’ve updated our kitchen light, dining room light, and hall light. We’ve also bought a new bathroom faucet and push drain. We were able to get these accomplished in a weekend and it was just a small project to keep us busy at home. We’ve been busy doing some work for family lately. Josh has been building a server for a business, and we’ve had a few smaller projects we’ve been dealing with. Josh also bought a 3D printer, the Ender 3 Pro, so we’ve been fiddling with that most recently.

Advertisements
Advertisements

Slow-Cooker Pigs in a Blanket using Cabbage

Advertisements

Old fashioned pigs in a blanket is a common meal that many people used to make about 100 years ago. This recipe was most commonly made by those who had family stemming from eastern Europe. Today, pigs in a blanket is typically something very different, usually a hot dog or mini dog wrapped in a puff pastry. These pigs in a blanket taste very different than the new version. The older version was savory flavored meat wrapped in a wilted and tender cabbage leaf and coated in a slightly sweet tomato sauce. Though this dish can be very messy to eat, it is filling and very delicious. This recipe makes 12 pigs and 4-5 adult sized servings. This recipe can also easily be doubled and frozen in a freezer container or casserole dish.

What You Will Need

  • 6 Large Cabbage Leaves, Halved with Middle Stem Removed
  • 1 Lb of Ground Beef
  • 1 Medium Diced Onion
  • 2 10.5 Oz Cans of Tomato Soup
  • 1 6 Oz can of Tomato Paste
  • 1 Tbsp Garlic Powder
  • 1 Tbsp Italian Seasoning
  • 2 tsp Paprika
  • Slow-Cooker
  • Strainer
  • Mixing Bowl
  • Large Dutch Oven of Water
  • Thongs and Wooden Spoon

Directions

  1. Bring dutch oven of water to a boil. Add Prepared cabbage leaves and boil for 1-2 minutes until soft. Transfer to strainer and let cool. Place burger in a mixing bowl, add 1/2 onion, garlic, Italian seasoning, and paprika. Mix by hand. Add 1 can of tomato soup to bottom of slow cooker and stir in 1/2 can of tomato paste.

2. Once cabbage is cooled, form about 1/3 cup of meat mixture into a patty. Place patty on cabbage leaf and roll, tuck under ends, then place into slow-cooker. Repeat for remaining leaves, or until out of filling. Place down first layer of pigs, then spoon each with a layer of soup from a new can. mix remaining tomato paste with remaining soup. Place your second layer of pigs, then top with remaining sauce. Add 1 can of water and remaining onion, carefully stir and place on high and cover.

3. Check every hour and spoon with hot sauce. Once they begin to shrink, push more into hot sauce. Cook pigs for at least 2.5 hours on high before serving, making sure they are thoroughly cooked first. Plate and let cool 10 minutes before serving.

Advertisements

New Fire Pit and Tilapia Foil Packet Dinner

Advertisements

We had an old fire pit in our backyard that was here when we bought the house this summer. It had minor rust, but it was still good enough to use. We left it out this winter, and to no surprise, most of the bowl had rusted out. We did one fire earlier this summer, but we lost not only ash out the bottom of the fire pit, but flaming coals as well! It was decided we needed to do something to update it. My In-law’s family has unlimited supply of oil barrels, and that was our source. First, we cut off the bottom 2 feet of the barrel using an angle grinder. We smoothed out the edge to make it less hazardous. Second, we disassembled the old fire pit. I really liked the mosaic ring, so my husband used the ring to hold the legs together as a rim, and welded it to the barrel to prevent our cover from falling in. He drilled several drainage holes in the bottom and air holes down the sides, we washed it out, put it in place, then added the stone ring. For our first fire it did very well. A barrel is pretty big for a fire pit, so if you plan to do the same, be sure to keep the fire small and contained. This fire pit also got extremely hot. The metal barrel was over 700 F, and the ground around it reached over 350 F with just 2 hours of use.

We cooked our packets over this fire pit. The grate we have is an old shelf from an oven, and was unphased after being licked by the flames. 15 minutes was long enough over our fire, but with even a smaller fire, 20 minutes should be more than enough. Everything was delicious, and there were no complaints. This recipe makes 2 packets, enough for 2 adult sized servings.

What You Will Need

  • 2 Potatoes, cleaned and diced
  • 1 Medium Onion, halved and sliced
  • 1/2 Green Pepper, sliced
  • 2 Garlic cloves, peeled and minced
  • 4 Tbsp Oil
  • 2 Tilapia fillets
  • 2 Tbsp Italian Seasoning
  • 2 Aluminum foil segments

Directions

  1. Place pieces of foil on the counter. Add Potatoes. onion, pepper, garlic, and oil evenly between foil pieces. Add tilapia on top. Add Italian seasoning, then seal up foil packet. (Optional) Add extra foil for extra strength.
  2. Build a nice large fire. Place grate over fire. Adjust fire so flames don’t touch the grate. Carefully, add packets over fire. Cook for 15 minutes. Move grate if fire jumps up to touch foil consistently, or if fire goes out under a packet.
  3. Transfer to a thick plate. Carefully open packets, and let cool for 5 minutes before eating.
Advertisements

Meals Without Refrigeration

This weekend, Josh and I were looking at an end of season camping trip. As the weather was getting colder, we decided it was now or never for finally going on a summer trip. We chose not to, but I did lots of research, and below that I will have a list of refrigeration free meals and snacks. This is not only a good resource for future camping trips, but it’s a good idea to have some of these items in storage for the next possible natural disaster.

Meals

  • Cereal with Evaporated/Powdered Milk
  • Oatmeal with Evap./Powdered Milk, with dried fruit
  • English muffins with Butter or Jelly packets
  • Bagels with Butter
  • Muffins, Banana/Pumpkin Bread
  • Canned Meat Sandwiches/Soups (Tuna, Chicken, Ham/Spam, Salmon, Clams, Etc)
  • Boxed Mac & Cheese
  • Canned Pasta (Ravioli, Spaghetti Os, etc)
  • Canned Soup (Condensed Chicken Noodle, Vegetable Beef, Chicken and Rice, Etc)
  • Spaghetti with Red Sauce
  • Cheesy Chicken Casserole, make in a pot over fire, and used canned chicken, exclude cheese if don’t have shelf stable
  • Tuna Salad Cucumber Boats
  • Buffalo Chicken Sandwich
  • Fried Rice with canned veggies/meat
  • Tuna Noodle with Evap./Powdered Milk and Canned peas

Snacks

  • Peanut Butter on bread
  • Crackers, Chips, Nuts, or Cookies
  • Pop Tarts
  • Fresh Fruits/Veggies
  • Apple Sauce
  • Granola Bars
  • Trail Mix
  • Fruit Cups/ Canned Fruit
  • Muffins
  • S’mores

August Weekend Harvest and Next Year Contemplation

Advertisements

This weekend we got a huge harvest from the garden. We pulled our 2 fabric pots of carrots and we harvested green beans after several weeks of waiting. For the green beans, we rinsed them then immediately preserved them. (I’ll do a post about preservation of food really soon. I have decided to freeze veggies this year since I have no interest in pressure canning.) As for the carrots, we pulled them in 2 batches and immediately took each batch inside to remove the carrot tops. You should immediately remove the carrot tops from your carrots once they leave the ground, because if they sit in 90 F weather for more than 10 minutes, it’s bad for both the carrot and the tops, if you plan to use them like us. Once all the carrots were separated, I used a brush and water to remove the dirty and roots. I also threw the carrot tops in a strainer and rinsed them before prepping them meals by removing extra length off the long stems.

I’ll do a post soon about how I preserved the carrots and green beans, as well as how I am saving my onion harvest that I pulled the end of last month.

I’ve also been thinking a lot about the garden for next year and maybe planting more for this fall. I have seeds for more radishes that I plan to plant this fall, however I’m still terribly indecisive. We are thinking of putting up one to two more raised beds by the peach tree that would be low maintenance plants, but we’re still deciding on that too. So far, I’ve decided on double the tomato plant for next year, 10 indeterminate, and another row of green beans but on a trellis double the height of the fence this year. I would also like to plant garlic this fall for next year, but I’m still determining were to place that. We are planning two fabric bags of each, potatoes and sweet potatoes. And, if we are able to get in one more bed, I’ve been thinking about bell peppers, cabbage, and broccoli. If we add a second bed, I’m also considering more onions and carrots. If you have any thoughts or input, it is greatly appreciated. This was my first year with a garden, so any advice is helpful.

Website Powered by WordPress.com.

Up ↑

Design a site like this with WordPress.com
Get started